MS Azure cloud setup with Pulumi (Alan Turing Institute)
Note
This guide on how to run a full setup of the Seshat django app on Azure with Pulumi based on this guide.
It assumes that you have access to a Seshat database dump, including all the spatial data. You can access it through the project’s Google Drive if you have access to it.
It assumes that you are located in the UK and have access to the Azure subscription that the Seshat project is under.
It assumes that your data tables are populated with the shape data. If it is not, you can populate them with the instructions in spatialdb.rst.
Warning
The setup is only partially automated with Pulumi currently. As you’ll see below, subsequent steps are required to that involve SSH-ing into the created VM.
This setup guide is specific to Azure, but can be followed outside The Alan Turing Institute with a credited Azure subscription.
Prerequisites
The following instructions assume you have the following software installed:
Python 3 (in order to use
venv)Pulumi
Azure CLI
Installation instructions for prerequisites
Python 3
Ensure you have a working installation of Python 3. The application has been tested with Python 3.8.13.
If you don’t have Python installed, you can download it from Python’s official website.
Pulumi
Ensure you have a working installation of Pulumi.
Hint
If you need to install Homebrew, you can find instructions on how to do so on Homebrew’s website.
If you don’t have Pulumi installed, follow the documentation e.g. on a Mac:
brew install pulumi/tap/pulumi
Azure CLI
Ensure you have a working installation of the Azure CLI.
If you don’t have the Azure CLI installed, you can download it from Microsoft’s official website.
Step 1: Log in to Azure
Ensure that you are correctly logged in and that the subscription you will use comes up in the list of subscriptions printed out, then set to that subscription:
$ az login
$ az account set --subscription "<subscription-id>"
Step 2: Create a virtual environment for Pulumi
You can use either Conda or Python’s built-in venv module to create a virtual environment (you could also re-use the environment you set up for Seshat development and install the requirements there).
Create the environment:
$ conda create --name seshat_pulumi
Activate the environment:
$ conda activate seshat_pulumi
Create the environment:
$ python3 -m venv seshat_pulumi
Activate the environment:
$ source seshat_pulumi/bin/activate
Install the requirements:
$ pip install -r pulumi/requirements.txt
Step 3: Set up a Pulumi stack
We assume here that you’ll use our provided Pulumi setup (located in the /pulumi directory in this repository).
Setting up a Pulumi stack from scratch
If you’re setting up a Pulumi stack from scratch, you can follow the below steps:
Set up a Pulumi stack for Azure Python:
$ pulumi new azure-python
Initialize a new Pulumi stack:
$ pulumi stack init <stack-name>
Select the stack:
$ pulumi stack select <stack-name>
Important
In the provided set up in the /pulumi directory, we have already set up the Pulumi stack for you.
In the included set up, we:
Chose a sensible project name: seshat-dev
Chose the stack name seshat
Chose
UKSouthlocationMade custom edits to the config files for the Seshat app
To set up this Pulumi stack, run the following commands:
$ pulumi stack init seshat
$ pulumi stack select seshat
Step 4: Configure Pulumi
You will need to provide the following configuration values:
sshPublicKey: The public key that will be used to SSH into the VM. You can find your public key by running:
The following command will set the sshPublicKey configuration value:
$ pulumi config set --secret sshPublicKey "$(cat ~/.ssh/id_rsa.pub)"
Step 5: Deploy the app
To deploy the app, run the following command:
$ pulumi up
Manual steps
The Pulumi setup is only partially automated. The following steps are required to complete the setup:
SSH into the created VM
Set up the database
Run the Django app
Manual step 1: SSH into the created VM
First, we want to get the public IP address of the VM:
$ pulumi stack output
This will output the public IP address of the VM. Make a note of this IP address as you will need it to SSH into the VM.
In order to SSH into the VM, run the following command:
$ ssh -i ~/.ssh/id_rsa webadmin@<VM IP adress>
Manual step 2: Set up the database
Once we’ve logged inot the VM, we need to set up the database. In this step, we create the database, add PostGIS to it, set a password for the superuser, update postgres to use md5, and restore the database from the dump.
To create the database, we need to open psql:
$ sudo -u postgres psql
Then, create the database:
CREATE DATABASE <seshat_db_name>;
Exit out of psql using \q.
Next, we need to add PostGIS to the database by opening psql again using the correct user:
$ sudo -u postgres psql -d <seshat_db_name>
Then, add PostGIS to the database:
CREATE EXTENSION postgis;
Exit out of psql using \q.
Manual step 3: Secure the database
Choose a password for Postgres. At Turing we have an Azure Key Vault set up under the project subscription where this can be saved (the one we have set up can be reused).
In order to add the password for the superuser, open psql:
$ sudo -u postgres psql
Then, add the password for the superuser:
ALTER USER postgres WITH PASSWORD '<db_password>';
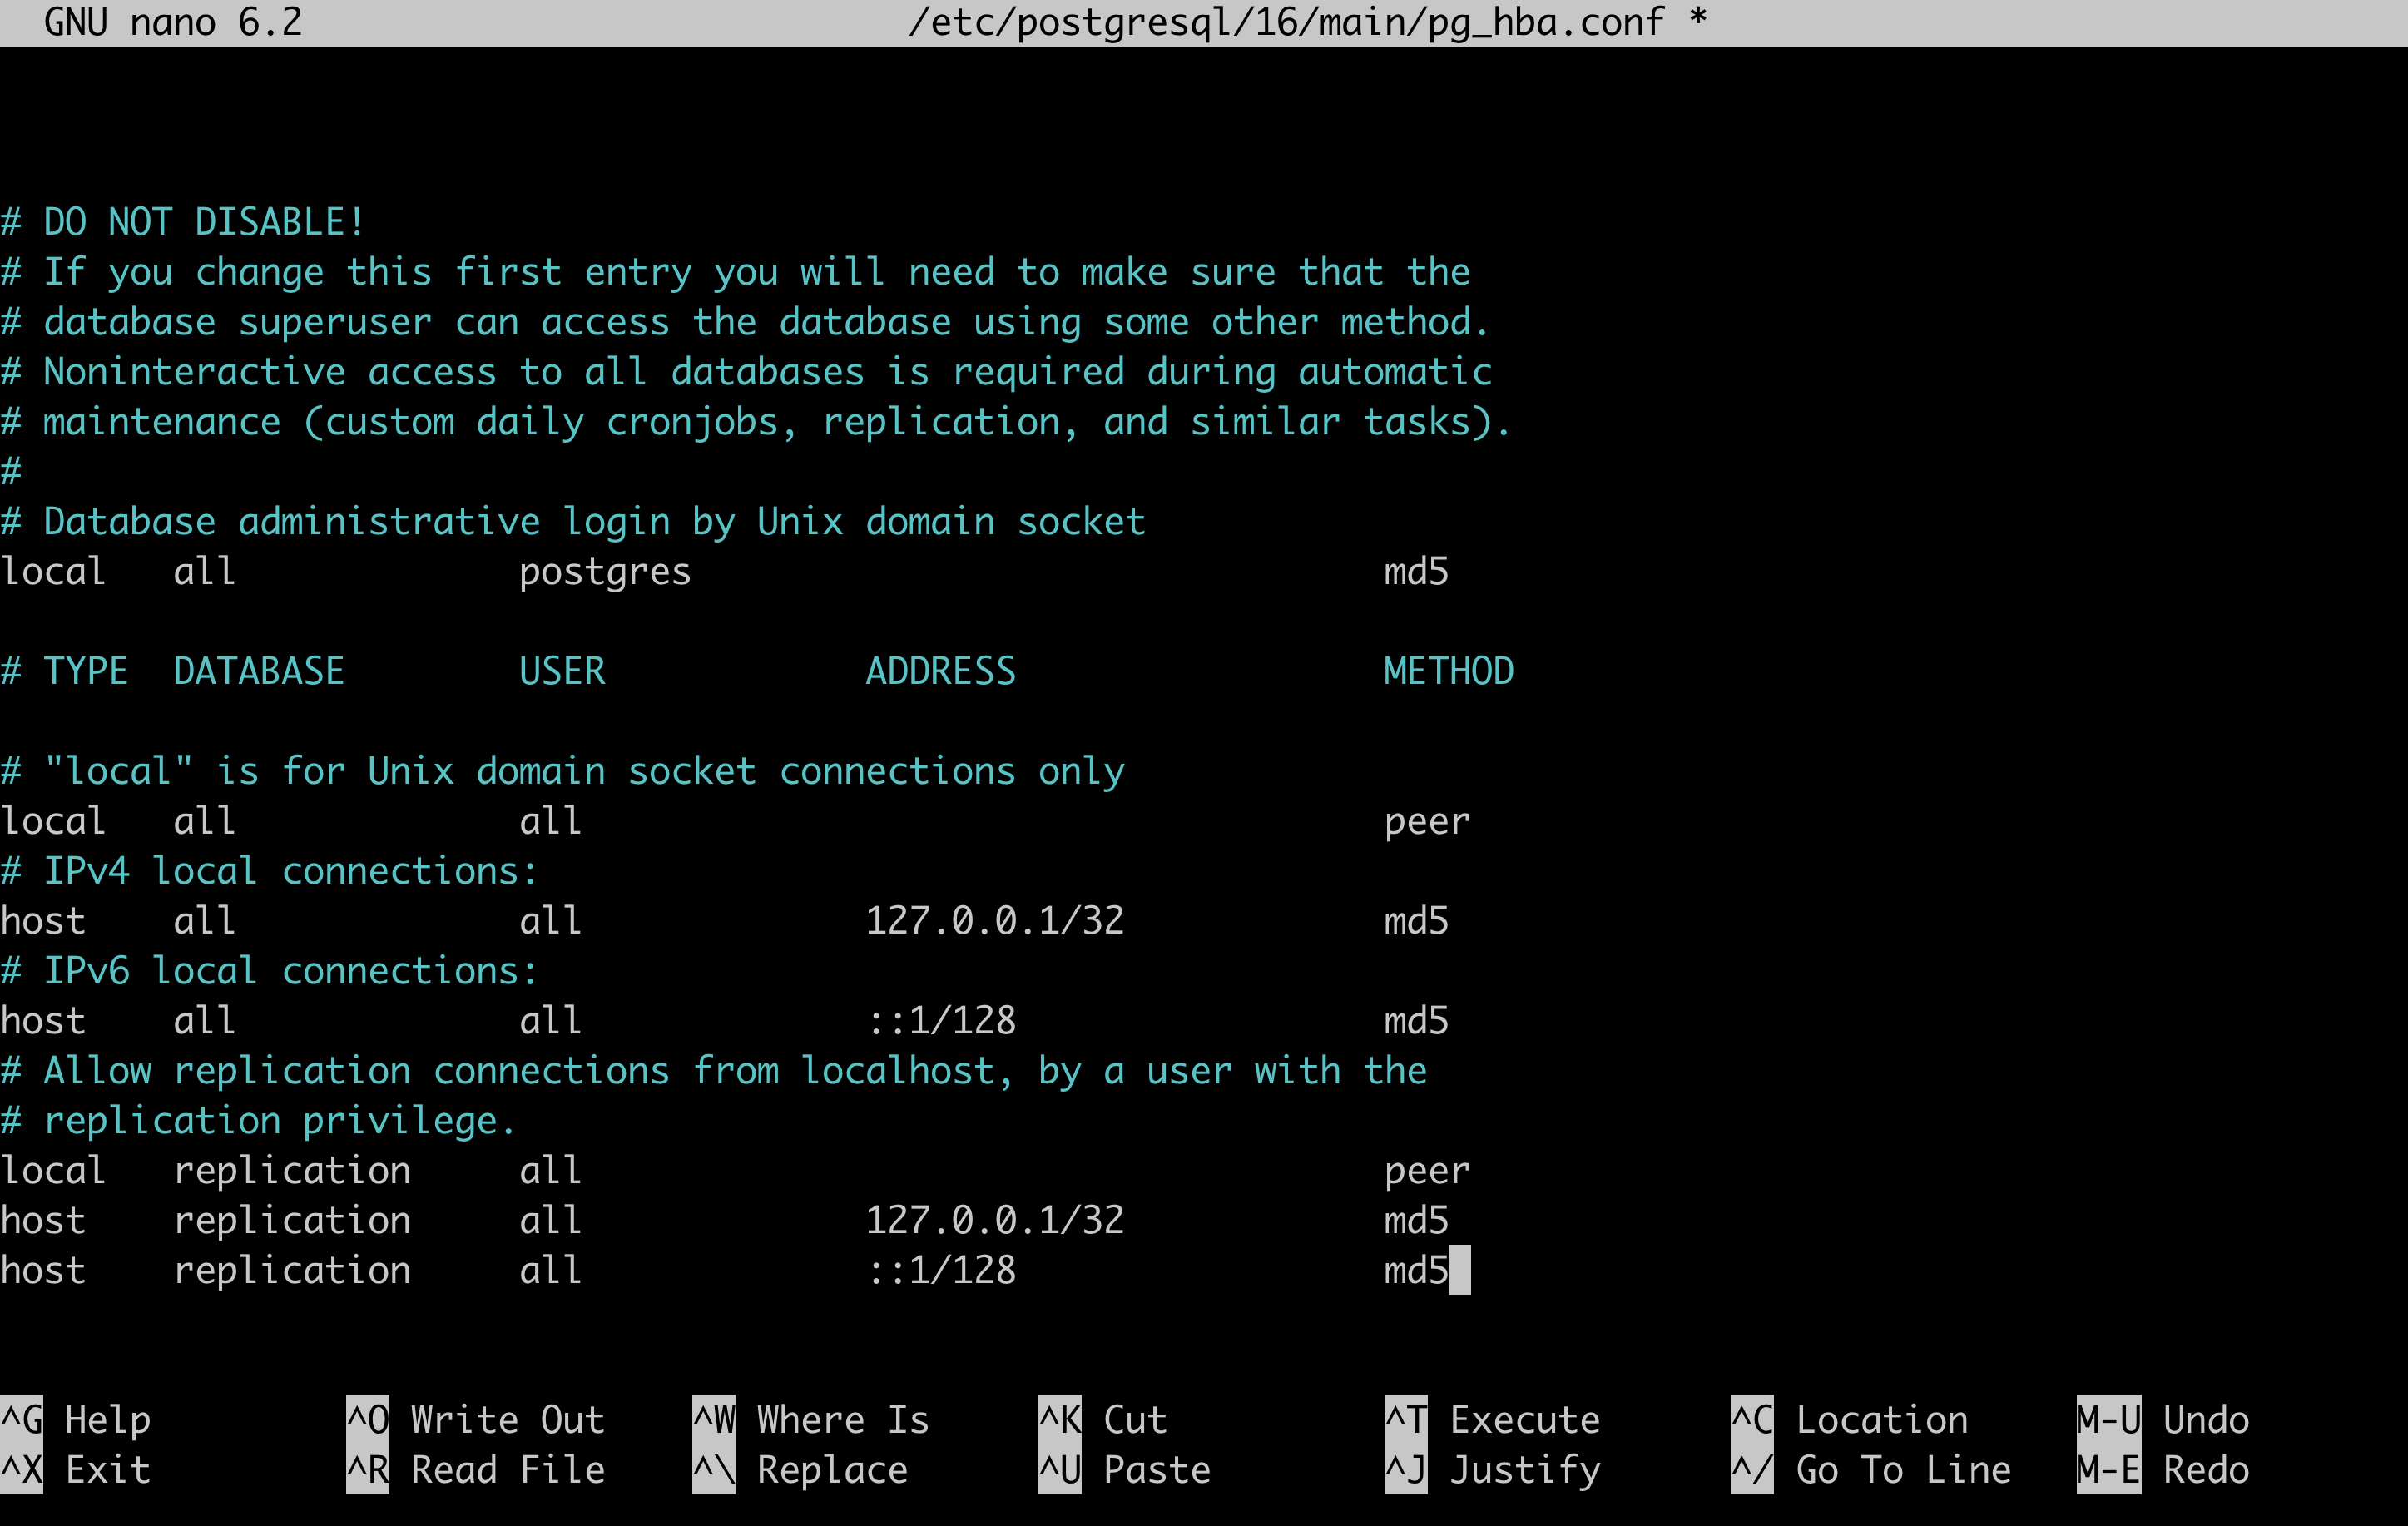
Update postgres to use md5:
$ sudo nano /etc/postgresql/16/main/pg_hba.conf
In order for the changes to take effect, reload postgres:
$ sudo systemctl reload postgresql
Exit out of psql using \q.
Manual step 4: Restore the database from the dump
Hint
This step assumes that you have access to the Seshat database dump.
You can access it through the project’s Google Drive.
In order to restore the database from the dump, run the following command:
$ sudo psql -U postgres <seshat_db_name> < ~/seshat.dump
[Optional] manual step 4.1: Update the database with the latest shape data
If you need to update the database with the latest shape datasets, you can do so by following the instructions in spatialdb.rst.
You can first upload the data files required to the VM using scp:
$ scp -i ~/.ssh/id_rsa path/to/datafile webadmin@<VM IP adress>:location_on_vm/datafile
Manual step 5: Collect static files
$ cd seshat
$ source venv/bin/activate
$ python manage.py collectstatic
Manual step 6: Add the IP address to the allowed hosts
First, open seshat/settings/local.py and add the created IP address to ALLOWED_HOSTS.
ALLOWED_HOSTS = ['<public IP>']
Then, ensure local (test site) settings are set:
$ export DJANGO_SETTINGS_MODULE=seshat.settings.local
Manual step 7: Run the Django app
$ sudo ufw allow 8000
$ cd seshat
$ source venv/bin/activate
$ export DJANGO_SETTINGS_MODULE=seshat.settings.local
$ gunicorn seshat.wsgi:application --config gunicorn.conf.py
Now, you should be able to go to the publicly’ exposed IP on port 8000: http://<public IP>:8000/.
[WIP] Manual step 8: Set up Nginx to work with Gunicorn
Untested instructions
You can test the app by running it with Gunicorn:
$ gunicorn seshat.wsgi:application --config gunicorn.conf.py
Visiting the public IP address in your browser should now show the Seshat app on the port 8000: http://<public IP>:8000/.
Kill the Gunicorn process with Ctrl+C.
Create a systemd service for Gunicorn:
$ sudo nano /etc/systemd/system/gunicorn.socket
Inside the file, add the following:
[Unit]
Description=gunicorn socket

[Socket]
ListenStream=/run/gunicorn.sock

[Install]
WantedBy=sockets.target
Next, create a systemd service file for Gunicorn. The service filename should match the socket filename with the exception of the extension:
$ sudo nano /etc/systemd/system/gunicorn.service
Inside the file, add the following:
[Unit]
Description=gunicorn daemon
Requires=gunicorn.socket
After=network.target

[Service]
User=webadmin
Group=webadmin
WorkingDirectory=/home/webadmin/seshat
ExecStart=/home/webadmin/seshat/venv/bin/gunicorn \
          --access-logfile - \
          --workers 3 \
          --bind unix:/run/gunicorn.sock \
          seshat.wsgi:application --config gunicorn.conf.py

[Install]
WantedBy=multi-user.target
You can now start and enable the Gunicorn socket. This will create the socket file at /run/gunicorn.sock` now and at boot. When a connection is made to that socket, systemd will automatically start the gunicorn.service to handle it:
$ sudo systemctl start gunicorn.socket
$ sudo systemctl enable gunicorn.socket
You can check the status of the Gunicorn socket and Gunicorn with:
$ sudo systemctl status gunicorn.socket
$ sudo systemctl status gunicorn
Next, we need to set up Nginx to pass web requests to the socket file:
$ sudo nano /etc/nginx/sites-available/seshat
Add the following configuration:
server {
    listen 80;
    server_name <public IP>;

    location = /favicon.ico { access_log off; log_not_found off; }

    location / {
        include proxy_params;
        proxy_pass http://unix:/run/gunicorn.sock;
    }

    location /static/ {
        autoindex on;
        alias /home/webadmin/seshat/seshat/staticfiles/;
    }

}
Change the content of nginx config to make sure that it can access all the files in our project:
$ sudo nano /etc/nginx/nginx.conf
On the top of the file, the user should be changed from www-data to webadmin:
user webadmin;
Then, link the file to the sites-enabled directory:
$ sudo ln -s /etc/nginx/sites-available/seshat /etc/nginx/sites-enabled
Check the Nginx configuration:
$ sudo nginx -t
If the test is successful, restart Nginx:
$ sudo systemctl restart nginx
You should now be able to access the Seshat app on the public IP address http://<public IP>/.